- 1 head cauliflower
- 3 tablespoons milk
- 1 tablespoon butter
- 2 tablespoons light sour cream
- 1/4 teaspoon garlic salt
- freshly ground black pepper
- snipped chives
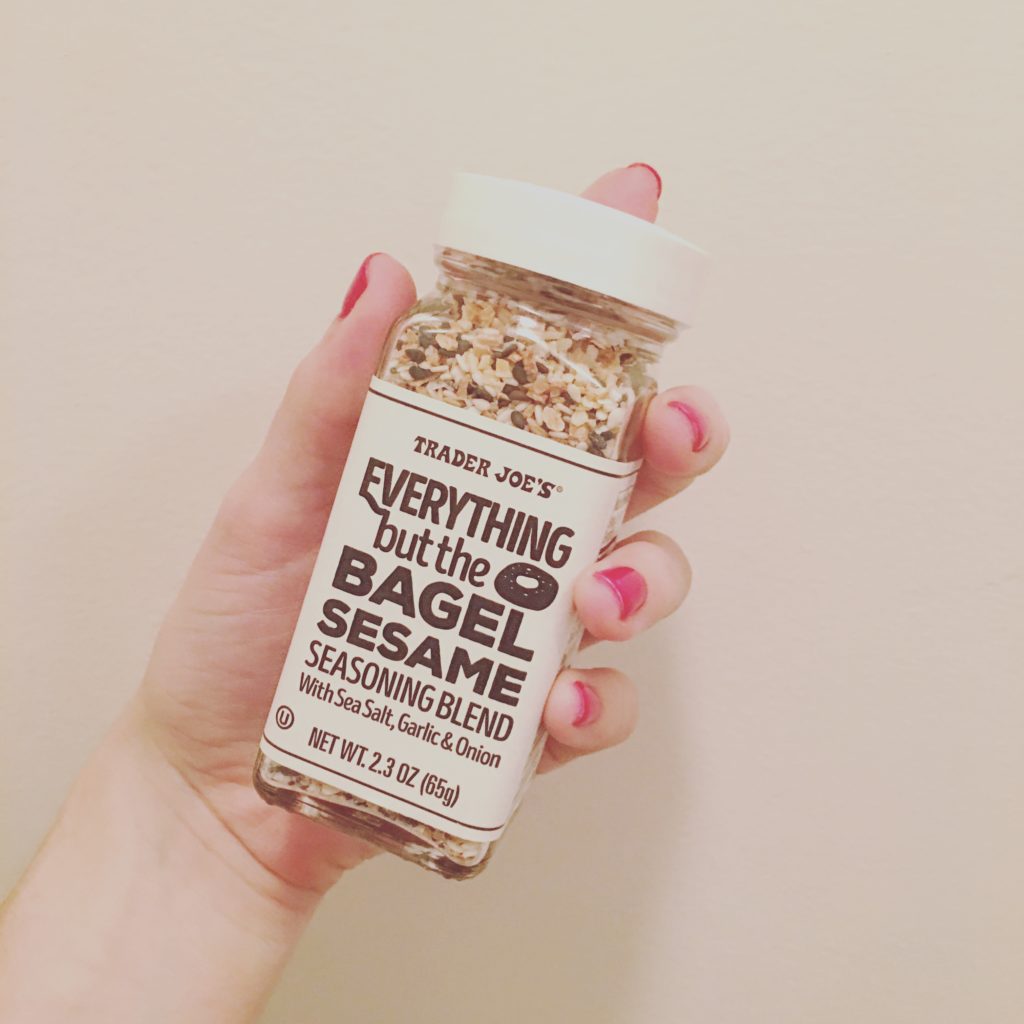
Humpday Treat – Everything But The Bagel
Happy Wednesday! So for the past few months I have season at least a dozen of my friends post, tweet, instagram, snapchat and tell me about this amazing seasoning I need to try. Now I am an avid Trader Joe’s shopper and I am very lucky that there is one conveniently located only two blocks away from my apartment in New York City. Today I finally said I was going to see what all the hype was about and try out this seasoning on my chicken I was planning on cooking for lunch. From everyone that I spoke to and everything that I read online it said that you could basically put this seasoning on anything. I tried it today on a plain piece of chicken breast that I cooked with some coconut oil in a frying pan. I barely put any on the chicken out of fear of over seasoning and I am glad I did. With just a little seasoning on my chicken it was full of flavor and was so delicious that I wanted more after I was all done. Trader Joe’s you really hit this one out of the park! If you haven’t already tried this seasoning you need to right away. It can literally be used on just about anything to add a little something to your meal. Hope everyone is having a great day and for those of us in New York City stay dry! This rain always makes me want to stay in and cuddle up on the couch. <3
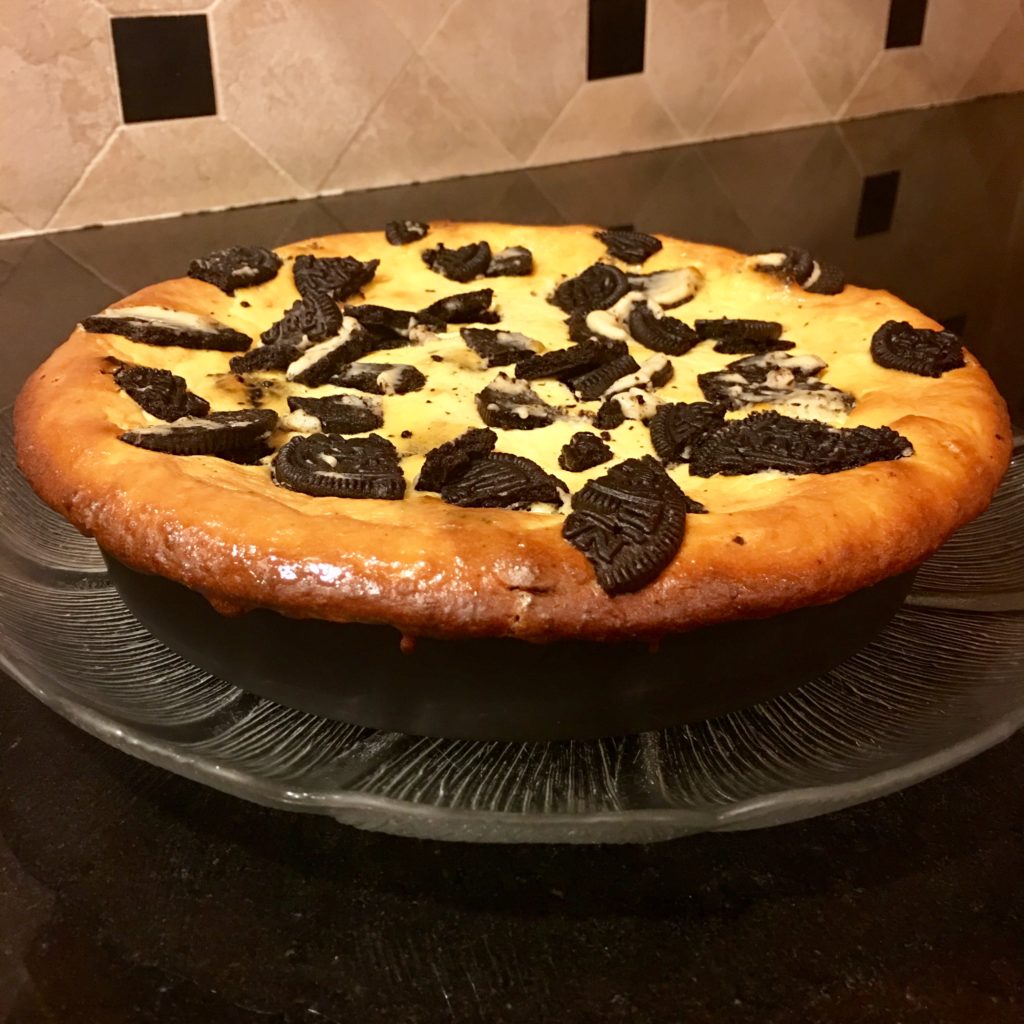
Hump Day Treat – Oreo Cheeseake
Happy Wednesday Everyone! Sorry that I have been MIA here on Just Jodi Style. I have been in Miami up until this past Sunday and then my sweet Stella got sick. Did you all know that sugar free gum is just as dangerous as a dog eating chocolate? Stella somehow found gum in a Taxi cab after our flight thankfully she is okay and doing well! While I was home my brother Ira decided he was going to finally make his famous Oreo cheesecake for the entire family! His first stop was going to Whole Foods. Obviously Whole Foods is the place to go when you are looking for healthier alternatives to the not so healthy ones. He found there the “healthy” Oreo alternative and all I have to say is WOW! These faux Oreos were unbelievable so creamy and delicious that I hate to say it gives the original Oreo’s a run for their money.
I always thought my brothers famous cheesecake was super complicated to make, but its really super simple! Here is what you will need:
Ingredients:
-36 Oreo cookies, divided
-1/4 cup butter, melted
-4 pkg. (8 ox. each) Philadelphia Cream Cheese, softened
-1 cup sugar
-1 tsp. vanilla
-1 cup breakstone’s or knudsen sour cream
-4 eggs
-springform pan for cheesecakes (very important otherwise it will be difficult to get it out of the pan
Directions:
1. Heat Oven to 325 F
2. Take 28 cookies in a plastic bag. Flatten bag to get rid of the excess air then seal the bag. Finely crush cookies by rolling a rolling pin across the bag. Place crumbs in bowl. Add butter and mix well. Press onto bottom of 9 inch springform pan.
3. Beat cream cheese, sugar and vanilla in a large bowl with a mixer. Add sour cream and mix well. Add eggs 1 at a time and beating after each until it is fully blended.
4. Chop or crush remaining cookies and gently stir the chopped cookies in the batter. The chopped cookies should be 1 – 1/2 cups.
5. Pour the batter over crust and sprinkle the remaining chopped cookies.
6. Bake 1 hour and 10 minutes or until center is almost set. Run knife around the rim of the pan to loosen the cake and make it easier to remove. Let the cake cool before removing from the springform pan.
7. Refrigerate for 4 hours.
8. Take out of the refrigerator and enjoy!
Hope everyone is enjoying the first official day of SUMMER!!!
Recipe was taken from Kraft Recipes Online Click here for the full recipe
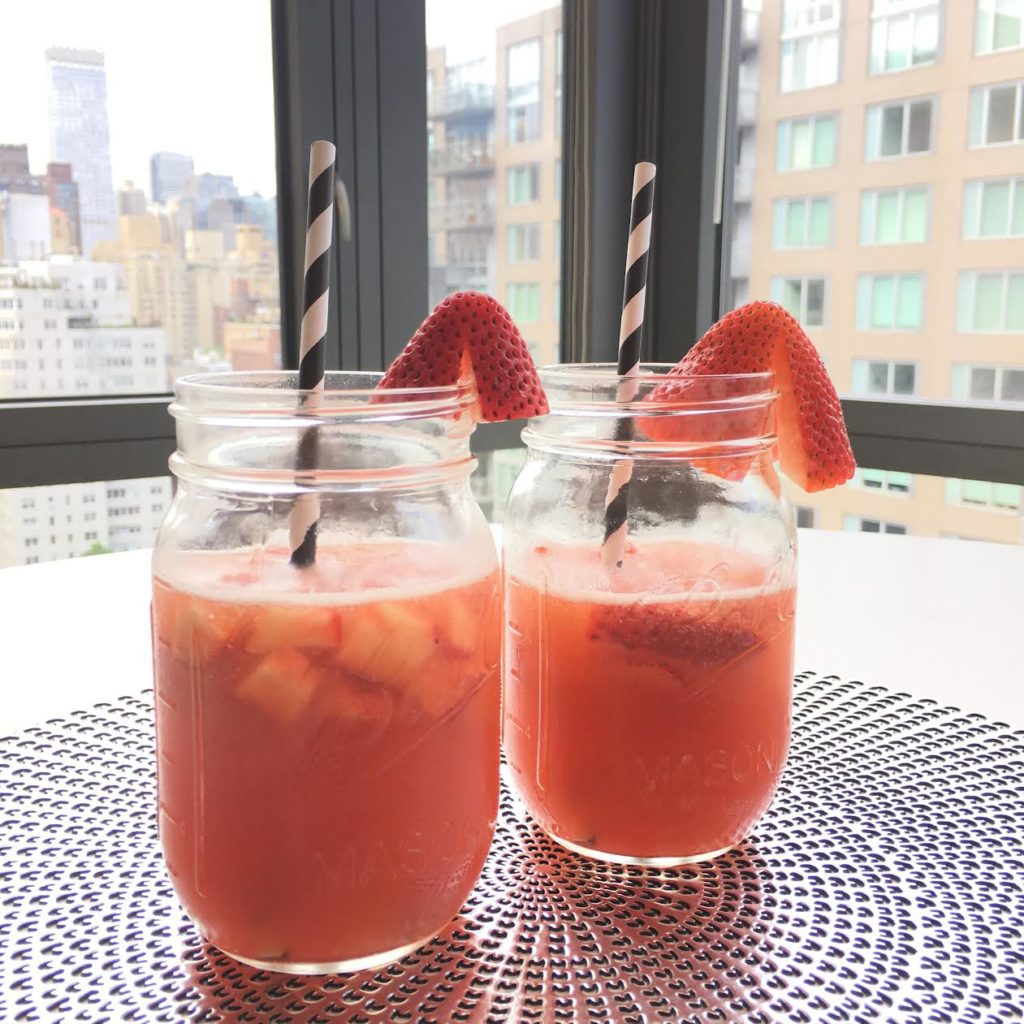
Hump Day Treat – Negroni Week
Happy Wednesday everyone! I have been feeling under the weather the past few days with a nasty cold, but I am starting to finally feel better just in time to head to Miami this weekend to spend some quality family time. Now when it comes to cocktails I am the girl that loves a sweet drink. I also love anything that involves my favorite fruit in the entire world….Strawberries. You could put any kind of alcohol in any alcohol as long as it involves strawberries there is a 99% chance I will drink it. I quickly found out via Instagram this week that it was #NegroniWeek and I wanted to make my own cocktail to celebrate it. Even though it may not feel like summer in NYC right now I thought why not prepare with a frozen drink. I made this frozen strawberry Negroni in my NutriBullet and it is honestly AMAZING!!! Here is what you will need:
Ingredients
-1 ounce Campari
-1 ounce Bulldog Gin (or really any kind of gin)
-1 ounce Cinzano 1757 Sweet Vermouth
-.75 ounce Orange Juice (No pulp)
-.5 ounce simple syrup
-1 strawberry
Directions:
-Blend all the ingredients together with some ice and garnish it with some strawberries or like me cut up some and put it inside the drink for a delicious frozen treat at the end of your cocktail.
Hope everyone is having a great week and enjoys today’s cocktail recipe <3
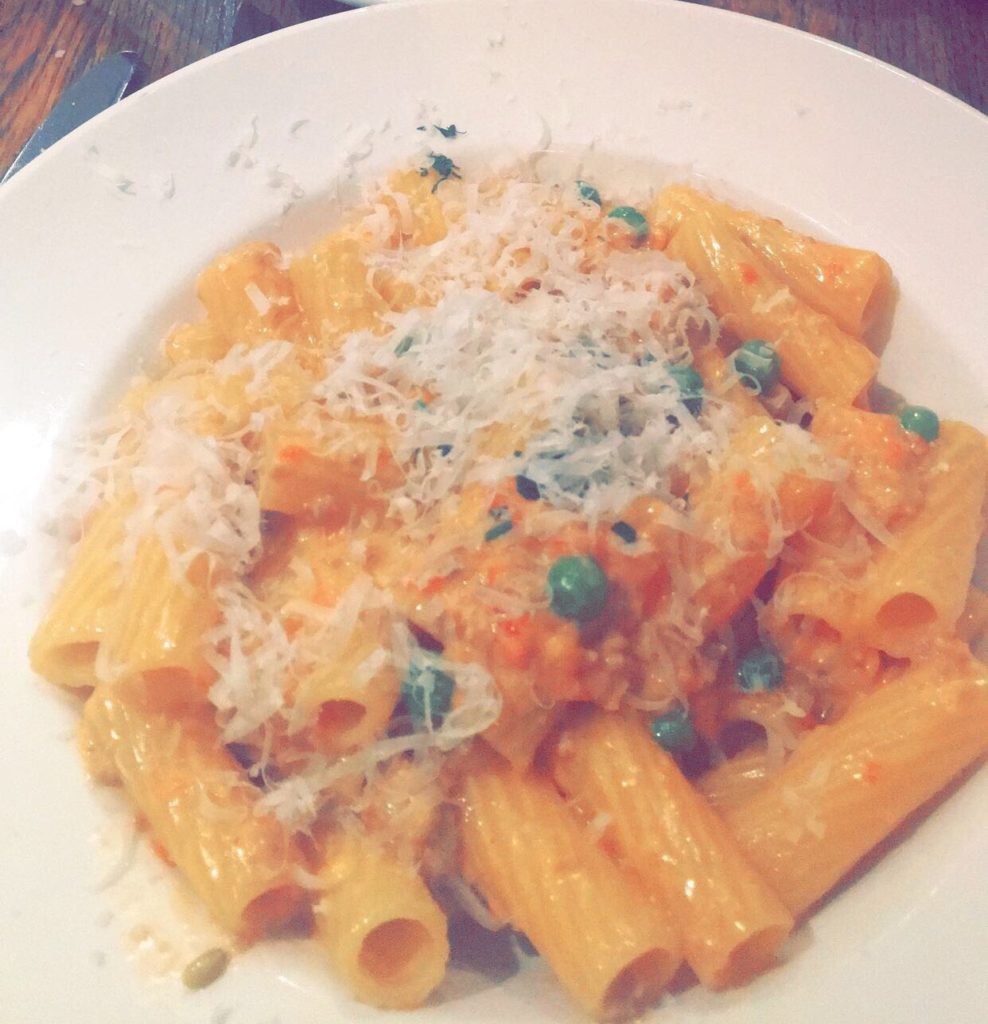
Hump Day Treat: Bar Pitti – Rigatoni Pitti
Happy Wednesday everyone! Since moving to New York City there are a few restaurants that I have come to love more than most. Ask any of my friends and if I could I would eat at Bar Pitti every week. The only flaw is that it is cash only and like most people I know no one rarely has cash on them. One of my best friends Rachael was determined to find a recipe for my go to dish the rigatoni pitti and I am here to tell you that she found it! I have personally made this recipe a handful of times and it is almost spot on to the classic rigatoni pitti at Bar Pitti. Here is what you will need:
Ingredients:
- 1 lb. rigatoni pasta
- 4 ounces fresh peas
- 2 tablespoons olive oil
- 8 ounces fresh turkey sausage, cut into 1/2″ pieces
- 1 14.5 ounce can crushed tomatoes
- 1 teaspoon salt
- 3/4 cup heavy cream
- Freshly grated Parmesan cheese
Directions:
1. In a large pot cook the rigatoni pasta ( al dente) while you are cooking the sauce so they are ready at the same time
2. In a pan that is large enough to fit the cooked pasta in it to heat up the 2 tablespoons of olive oil on a medium heat
3. Add the turkey sausage and fry until lightly browned on both sides
4. Remove the sausage from the pan and put aside (I usually put it on a a small plate). Remember do not remove any of the oil or anything from the pan after removing the sausage. You will want these juices for the next step.
5. In the pan with the olive oil and removed turkey sausage add the crushed tomatoes and salt. Simer for a few minutes then lower the heat to low.
6. Add cream and stir allowing sauce to heat up for a few minutes. Make sure the sauce does not boil.
7. Add the sausage back to the pan and then add the peas. Mix it all around
8. Then add the cooked rigatoni and toss and mix everything around so that the sauce covers all the pasta.
9. Top each plate with parmesan cheese and serve immediately!
Hope you all enjoy today’s Hump Day Treat recipe <3
Hump Day Treat: Vegetarian Chili
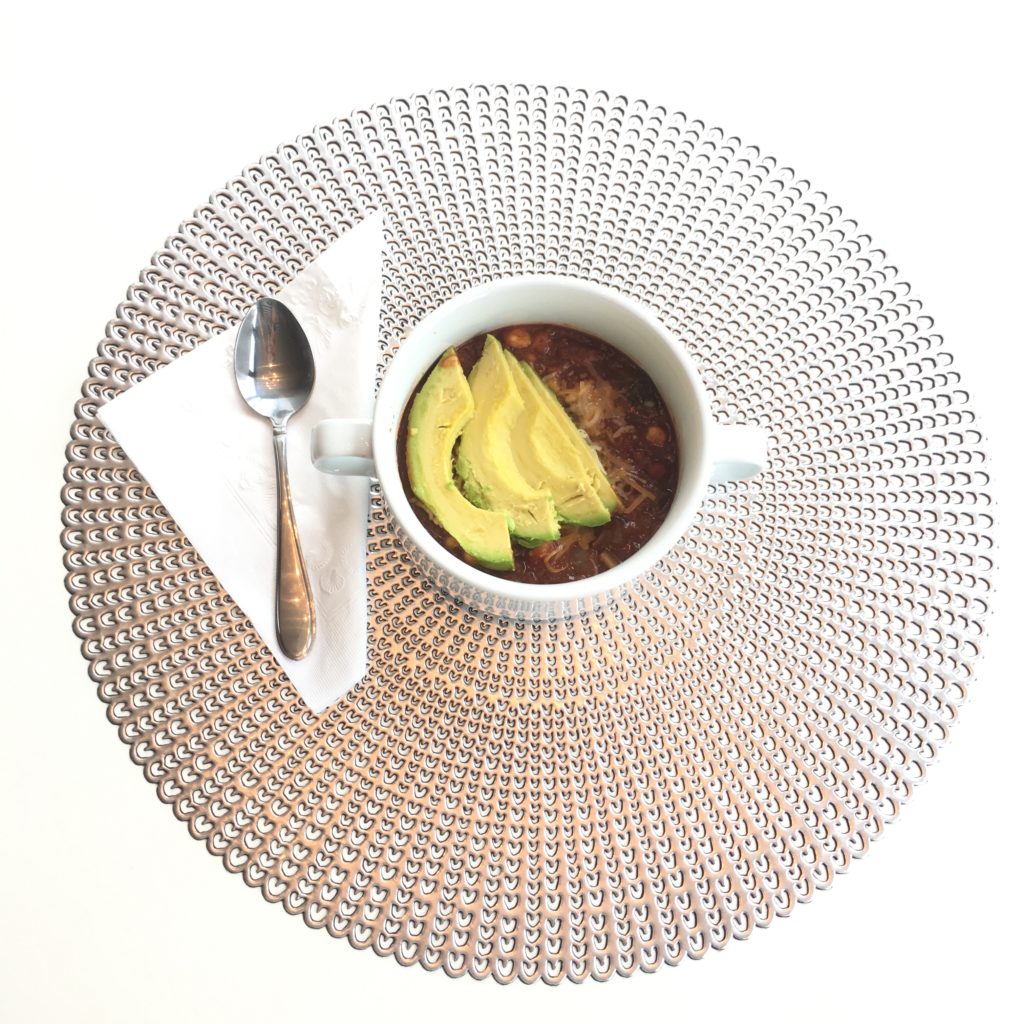
It’s Wednesday so it’s time for another hump day treat recipe for you all! Now every Monday night a bunch of my friends and I gather together to watch The Bachelor / Bachelorette / Bachelor in Paradise depending on the time of the year. One of my friends came up with the idea that each week we would rotate who would bring either alcohol, appetizers, main course and dessert for the week. If you cook the main meal one week that means the following week you don’t have to bring anything! The only problem is in our group we have a lot of allergies including gluten free, dairy free and vegetarian. Try finding a main course that fits all of those criteria’s people! Not to worry this week I found something that worked for everyone. Recently I got a slow cooker from my Mom and needless to say I am very excited about it. I decided to make vegetarian chili in the slow cooker for Bachelor night. Anyone else remember those infomericals where the guy said, “Set it and…FORGET IT!” That is how I feel about a slow cooker. I just put all of the ingredients into the slow cooker and set it on high for two hours and like magic it was ready to go. Thanks to allrecipes.com I was able to find the perfect vegetarian chili. There are a few changes I made to it personally. I didn’t add peppers into my chili and I also used a sweet onion when the recipe didn’t specify what kind. Here is what you will need:
Ingredients:
- 1 (19 ounce) can black bean soup
- 1 (15 ounce) can kidney beans, rinsed and drained
- 1 (15 ounce) can garbanzo beans, rinsed and drained
- 1 (16 ounce) can vegetarian baked beans
- 1 (14.5 ounce) can chopped tomatoes in puree
- 1 (15 ounce) can whole kernel corn, drained
- 1 onion, chopped
- 1 green bell pepper, chopped
- 2 stalks celery, chopped
- 2 cloves garlic, chopped
- 1 tablespoon chili powder
- 1 tablespoon dried parsley
- 1 tablespoon dried oregano
- 1 tablespoon dried basil
I personally added sliced avocado on top and for the few of us that could eat dairy I added a sprinkle of Mexican cheese on top. This recipe makes enough to feed 5 people at least 3 bowls each! Crazy I know, but it’s true. Two hours on high in the slow cooker like I said is all you need. Hope everyone is ready for Memorial Day Weekend! Have a great day <3
Hump Day Treat : Updated Grilled Cheese
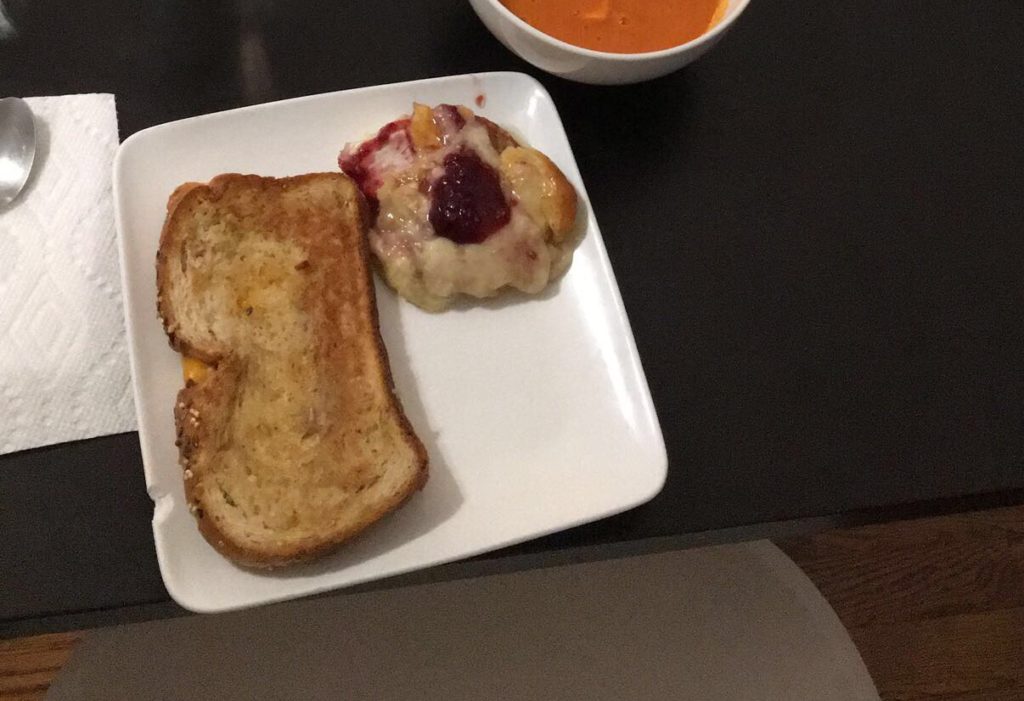
Happy Wednesday! One of my favorite lunch meal at sleep away camp was the day we would have grilled cheese with tomato soup. I was never a big grilled cheese eater as a little kid until sleep away camp. There are so many different ways to reinvent a simple grilled cheese sandwich. For today’s hump day treat I want you all to try either of these combos: sharp white cheddar with avocado ( you add the avocado on top after you obviously melted the cheese) or brie with raspberry jelly. If you are eating it with tomato soup my favorite thing to do is add shaved cheese on the soup while it’s still warm so it melts inside. I know exactly what I am having for dinner tonight :-). Hope everyone had a great day and for those of us in New York City I hope you are enjoying this beautiful weather we are having right now. <3
Hump Day Treat: Whole Wheat Lasagna
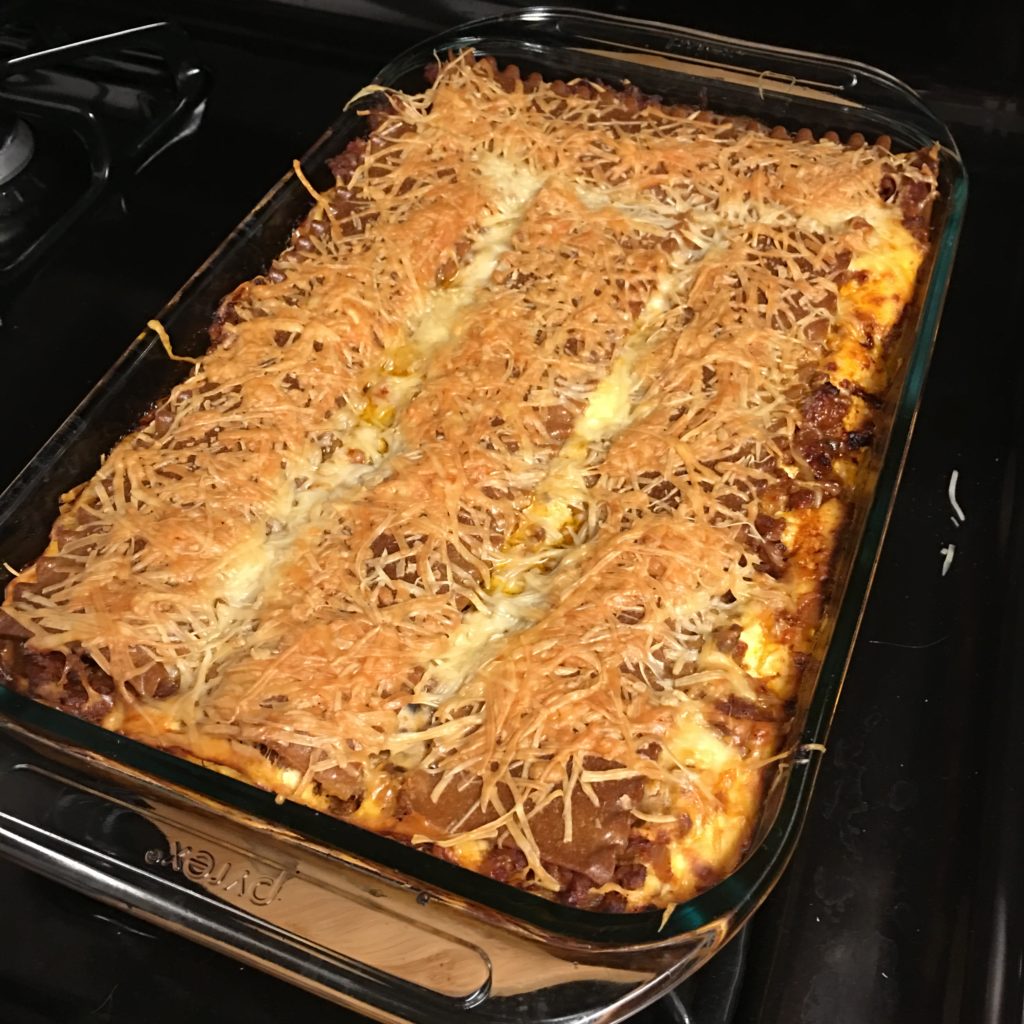
Hi Everyone! Hope everyone is having a great Wednesday so far and for all of us in New York City is getting back into the swing of things after Stella rolled through yesterday with all of her snow and in some places hail. EEK! One of my favorite things to do on these snow days is to cook a hearty meal that will keep me warm and is something that I can easily heat up the next few days without too much hassle. I love lasagna just like Garfield it is easy to make and something that you can easily reheat in the oven if you want to make sure each layer is fully warm. If you don’t have the time to do that you can simply re heat it in the microwave or simply eat it cold. There is no right or wrong way to re eat lasagna leftovers. Fun fact for everyone I used to think you had to cook the noodles prior to making the lasagna because no one had told me otherwise. However, when I picked up the box of whole wheat lasagna noodles at the store on Monday I discovered that you can simply put the noodles in the pyrex not cooked and it will cook itself while in the oven! An extra step gone from this process. Here is what you need
Ingredients:
-ingredients to make bolognese sauce ( I have previously posted my recipe, but any recipe you may have will work perfectly 🙂 )
-3 cups of ricotta cheese
-12 ounces of shredded mozzarella cheese
-¾ cup of grated parmesan cheese
-2 eggs
-box of lasagna noodles
Directions
1.Cook the bolognese sauce that I previously posted on my blog 🙂
2.Preheat the oven to 400 degrees
3.In a bowl mix the ricotta cheese, mozzarella cheese, ½ cup of parmesan cheese and the 2 eggs. Set aside once it’s fully mixed
4.In a pyrex dish first grease the pan with pam cooking spray
5.Take a large scoop of the bolognese and layer the bottom of the pyrex
6.Top it with lasagna noodles normally its two full noodles
7.After the noodles put thin layer of the cheese mixture normally about 1 ¼ cups
8.Repeat the layers until you are the top of the pan. Once at the top top with the 2 remaining lasagna noodles. If you wish cover the top of the noodles with parmesan cheese
9.Bake in the oven for 30 minutes until hot and bubbling. After taking it out of the oven let it cool for 10 – 15 minutes.
10.Cut into squares and if you wish make some garlic bread and enjoy!
Hope everyone had a fun snow day yesterday and for most of us a great day working from home. Enjoy today’s hump day treat!
Hump Day Treat – Colored Cake
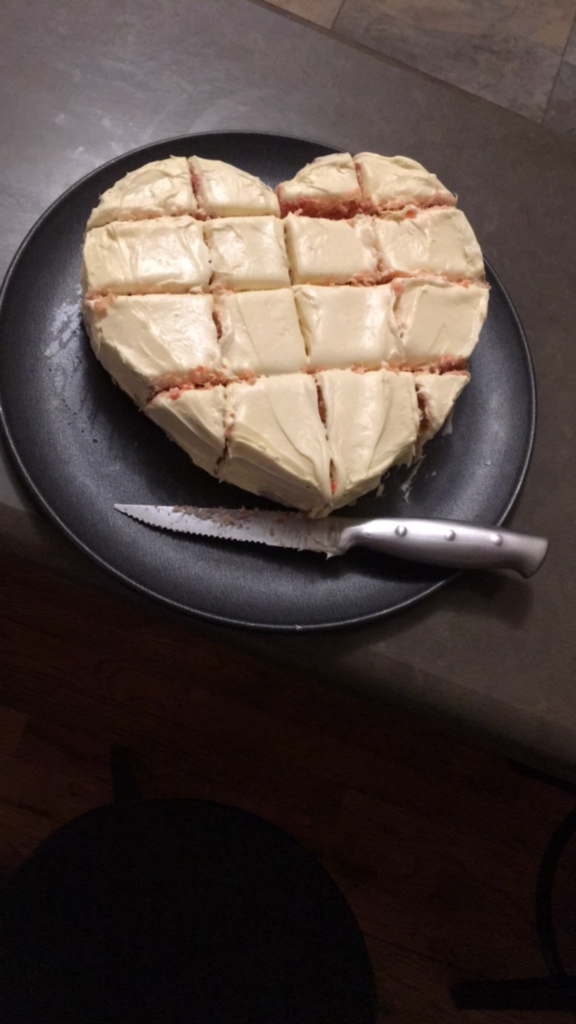
Happy first day of March everyone! I can not believe that it is March 1st today. This year has truly gone by so fast. When I was in middle school I decided to do a science fair project to see if color really affected how food tasted to someone. Fun fact for all of you… IT DOES! I did this by adding food coloring to vanilla cake mix and having my friends taste two different cupcakes. One with food coloring in it and one without. I had them taste each of the same cupcakes blindfolded then not. Pretty crazy right? Anyways I always thought before this project that if a cake had color in it that it meant it was flavored with whatever color was added. All it takes is a little food coloring to add something special to your dessert. For example this cake pictured in today’s post was simply colored with red food coloring. Now most people assume that if you add red food coloring it will be red, but if you only add a few drops to a white cake mix it will turn your cake pink and not red. If you have seen all those amazing ombre colored cakes on Pintrest this is what they all do. Make one cake with one drop of food coloring of you choice then the second one with 3 – 4 and then depending on how many layers you want continue up. This way each layer gradually is a darker shade of whatever color that you use. I hope you all are having a great week so far and for those of us in NYC enjoying this crazy weather we are having. Anyone else ready for some snow? I am most definitely not! Enjoy today’s hump day treat of fun facts<3
Hump Day Treat – Chicken in The Pot
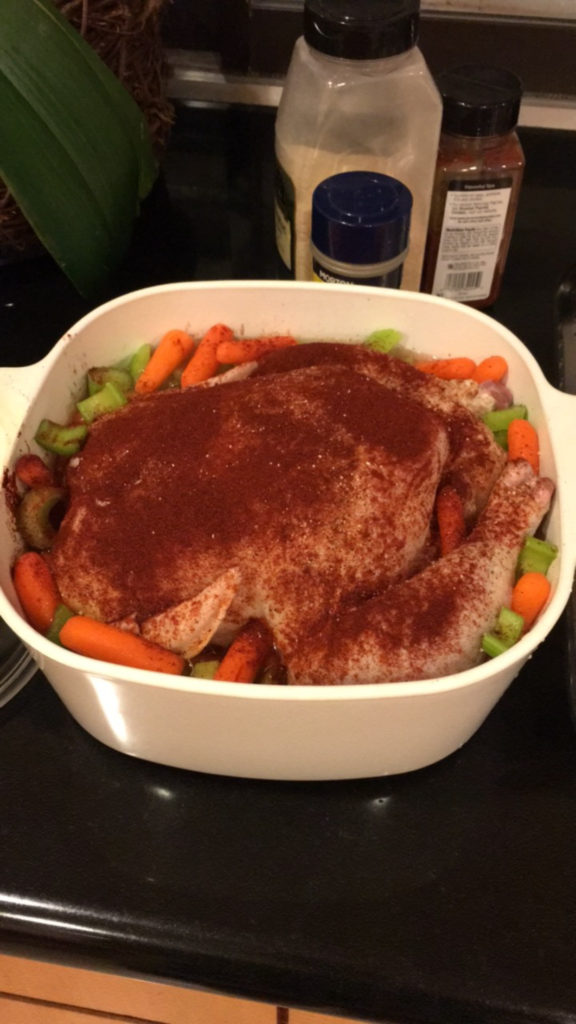
Happy Wednesday! Sorry I have been so MIA here on Just Jodi Style. I flew last weekend to Scottsdale to see one of my best friends get married. I also had the honor of signing her Ketubah which when she asked me to do it I cried in the middle of SoulCycle. Thanks Sara <3. Anyways I am finally back in New York and ready for the week. When I was younger my Mom always cooked us dinner during the week on top of working every single day. We all had our favorite meals that she would cook us and this one was one my favorites. She always made up names for the dishes she made since we were young and didn’t fully understand everything. This dish she called chicken in the pot. It is a whole chicken that you put into a dish as shown in the image above called a deep dish corning-ware or you can also make this in a crock pot! I have done that as well before and it is delicious. Here is what you need:
Ingredients:
1 package of baby carrots
1 package of celery
1 whole chicken
Paprika
Garlic salt
Morton’s Seasoning
1 small spoon of crushed garlic
1 deep dish corning-ware (size depends on the size of the chicken you wish to cook)
Instructions
1.Heat the oven to 350 Degrees.
2.Clean out the chicken and pat it dry. Then place it in the deep dish corning-ware or crock pot.
3.Take the celery and cut it up into small pieces. Once the chicken is in the deep dish corning-ware or crock pot scatter around the celery and carrots. You can also place some inside the chicken. Once this is done then take one small spoon of crushed garlic and put it on the inside of the chicken.
4.Once you have added all the veggies and the crushed garlic cover the whole top of the chicken with paprika seasoning. Then add a dash of the garlic salt and a dash of the morton’s seasoning.
5.If your chicken doesn’t have one of those poppers to tell you when it’s done please be sure to add it now. This is important in order to know when your chicken is fully cooked.
6.Take a measuring cup and fill the dish with water just to the point that it’s not covering the chicken. I’d say about close to half way up the chicken.
7.Place chicken in the oven. Make sure if you are using a dish like the one in my image that you cover it as well as your crock pot for it to cook.
8.Depending on how large the Chicken is it will take at least 3 – 4 hours to cook.
9.While the chicken is cooking I would cook your sides. I personally love white rice and peas with this dish.
10.Once the popper has popped on your chicken you are ready to go! It should be moist and if you cooked it in a crock pot the chicken usually just falls right off the bone.
Hope you all enjoy!!!